Quantcast
Channel: remote control | Battery Guide
Viewing all 27 articles
Browse latest View live

6 CHANNEL RF REMOTE CONTROLLER USING CC2500 RF MODULES

$
0
0

 RF Remote Controller

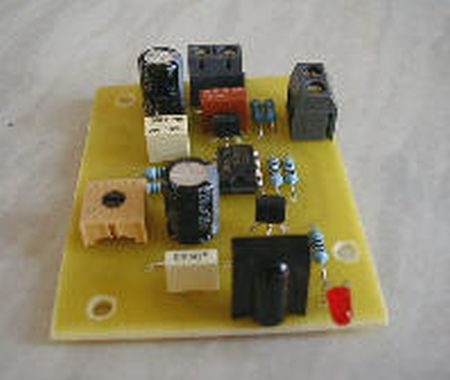
The 6 Channel RF Remote Controller designed using CC2500 RF Transceiver modules and PIC16F1847 micro-controller from microchip. Transmitter provided with 6 tact switch, 4 Address Jumpers to pair multiple unit so they don’t interfere with each other. Board provided with power LED, valid transmission LED. Project works with 5 V DC, On board LM1117-3.3V regulator for CC2500 Module.  Two in one PCB can be used as Transmitter & Receiver.

Receiver works with 5V DC. 4 Jumper to paring RX& TX units, valid signal LED, power LED, and 9 Pin connector for outputs.  Same PCB is used as transmitter and receiver.  All outputs are Latch Type and TTL 5V Signal for easy interface with other devices like Relay Boards, Solid State Relays.

CC2500 RF Module

The CC2500 is a low-cost 2.4 GHz transceiver designed for very low-power wireless applications. The circuit is intended for the 2400-2483.5 MHz ISM (Industrial, Scientific and Medical) and SRD (Short Range Device) frequency band. The RF transceiver is integrated with a highly configurable baseband modem. The modem supports various modulation formats and has a configurable data rate up to 500 baud. CC2500 provides extensive hardware support for packet handling, data buffering, burst transmissions, clear channel assessment, link quality indication and wake-on-radio.

The main operating parameters and the 64-byte transmit/receive FIFOs of CC2500 can be controlled via an SPI interface. In a typical system, the CC2500 will be used together with a microcontroller and a few additional passive components.

for more detail:6 CHANNEL RF REMOTE CONTROLLER USING CC2500 RF MODULES

The post 6 CHANNEL RF REMOTE CONTROLLER USING CC2500 RF MODULES appeared first on PIC Microcontroller.


IR RF TRANSCEIVER CIRCUITS 8 CHANNEL REMOTE CONTROL

$
0
0

IR and RF transceiver circuits PIC16F628 microcontroller based on the software assembly prepared by the donor of the above değşiklik without just sittin ‘with IR or RF controls can be made 8-channel and 4-channel...Electronics Projects, IR RF Transceiver Circuits 8 Channel Remote Control “microchip projects, microcontroller projects, pic16f628 projects, “

IR RF TRANSCEIVER CIRCUITS 8 CHANNEL REMOTE CONTROL

IR and RF transceiver circuits PIC16F628 microcontroller based on the software assembly prepared by the donor of the above değşiklik without just sittin ‘with IR or RF controls can be made 8-channel and 4-channel different circuits there buyers card relay controlled RF modules price is high, the IR transceiver be used for long-distance or the RF circuit module is used. Asm source code control system could also solve the enlightened can help.

Read More: IR RF TRANSCEIVER CIRCUITS 8 CHANNEL REMOTE CONTROL

The post IR RF TRANSCEIVER CIRCUITS 8 CHANNEL REMOTE CONTROL appeared first on PIC Microcontroller.

IR Remote Control Repeater using PIC12F629

$
0
0

This circuit receives the signal from a IR remote control, like those used to control your TV or DVD player and allows the signal to be repeated in another location.  

IR Remote Control Repeater

To get a 40Khz carrier requires an output to be toggled on and off 40,000 times a second, which means the code needs to execute in 1,000,000/40,000 instruction cycles; this gives a very tight 25 instructions in which to do the job. Fortunately it’s an easy job to do so most of the instructions are just used to waste cycles.  It’s not easy to get an accurate frequency with so little time and  few instructions cycles to play with but the IR receivers  will work several Khz either side of their design detection frequency so it’s not a problem.

This code can generate a 40Khz, 38.4Khz or 37Khz carrier with a ~15% duty cycle.  The frequencies are configurable in the source code such that once programmed GPIO5 input on the PIC allows the selection of two frequencies.  By default the code is set to produce 40Khz and 37Khz carriers which are modulated by the logic level on GPIO2.  This would generally be connected to a IR decoder IC.

One thing I did find with the Sony equipment (I haven’t tested it with anything else), 875nM IR LEDs don’t seem to work, but the 950nM one specified works well. (TSUS5400, Mfg Vishay. Available from Farnell, part number 178302)

  • Source Code (supports 12F629, 12F675, 12F683 21/06/2009)
  • Hex (right-click Save As) for 12F675 / 12F629.
  • Hex (right-click Save As) for 12F683
  • Schematic


For more detail: IR Remote Control Repeater using PIC12F629

The post IR Remote Control Repeater using PIC12F629 appeared first on PIC Microcontroller.

WIRELESS REMOTE CONTROL for Raymarine ST4000 Autopilot using PIC16F628

$
0
0

I had designed a remote unit for my ST4000+ autopilot. It did prove out the concept and I used it a lot, but it sported an unsightly coil cord (and of course unsightly coil cords have no place on boats) so I decided to build a wireless remote. The system (handheld Tx unit and stationary Rx unit) is based on a pair of microcontrollers and a pair of 433MHz radios.

seatalk_wireless_remote

The keypad/transmitter is on the left. It consists of a PIC16F628 microcontroller, Parallax 433MHz transmitter module ( and antenna, and membrane keypad built into the plastic box. It’s powered by a 9V battery. Power saving firmward allows it to run continuously for several months…there is no power switch. The receiver is on the right (above.) It consists of a Parallax 433MHz receiver module and antenna, PIC16F628 microcontroller, and Seatalk interface components. Schematic and firmware details are below.

seatalk_wireless_remote_schematic

Code:

/****************************************************************************

seatalk_wireless_remote_tx_1.c

This program is a remote control transmitter that sends a RxCx
number in an eight-byte message sentence with checksum.

Message protocol to the wireless receiver
* Each 9600 baud message contains a command and checksum:
   0xff    // wake up the transmitter and receiver
   0xff    // wake up the transmitter and receiver
   0xff    // wake up the transmitter and receiver
   'J'     // character
   'S'     // character
   'F'     // character
   cMsgCode   // which key was pressed
   'J' + 'S' + 'F' + cMsgCode   // equals checksum

                    +5
                    |
                    14
                ----------
      R4 ----6-| B0    A0 |-17-- out to Parallax 433MHz transmitter
      R3 ----7-| B1    A1 |-18-- out to LED
      R2 ----8-| B2       |
      R1 ----9-| B3       |
      C3 ---13-| B7       |
      C2 ---12-| B6       |
      C1 ---11-| B5       |
               |          |
 10MHz XTAL-15-|  16F628  |
       XTAL-16-|          |
                ----------
                     5
                     |
                    Gnd

          KEYBOARD ASSIGNMENTS
            C1      C2      C3
        +------------------------+
    R1  |      (cable here)      |
        |                        |
    R2  |                        |
        |                        |
    R3  |                        |
        |                        |
    R4  |                        |
        +------------------------+

***************************************************************************/

For more detail: WIRELESS REMOTE CONTROL for Raymarine ST4000 Autopilot using PIC16F628

The post WIRELESS REMOTE CONTROL for Raymarine ST4000 Autopilot using PIC16F628 appeared first on PIC Microcontroller.

NEC Protocol IR (Infrared) Remote Control With a Microcontroller

$
0
0

Introduction 

This little project will demonstrate how you can build NEC protocol based Infrared Remote Control to use with various NEC Protocol IR receivers.

actually there are lots of projects out there to accomplish this task but i have to write my own code because of too many requests on this IR(infrared) Remote Control Relay Board with PIC 12F675 Microcontroller   people keep asking “Where is the Transmitter for this” although you can use any NEC protocol based remote ,but i just wanted to build one by my self. so here it is.

NEC Protocol IR (Infrared) Remote Control With a Microcontroller

Consumer IR protocols
There are a number of consumer Infrared protocols out there and they have been used for every single purpose possible i guess, like PDA laptops and other consumer appliances. RC-5 & RC-6 by Phillips , RCA are few examples of consumer IR protocols.

In this demonstration we will stick the to NEC protocol by NEC corporation,

NEC Infrared Protocol 
  • A 9ms leading pulse burst (16 times the pulse burst length used for a logical data bit)
  • A 4.5ms space
  • The 8-bit address for the receiving device
  • The 8-bit logical inverse of the address
  • The 8-bit command
  • The 8-bit logical inverse of the command
  • Final 562.5µs pulse burst to show end of message transmission.
  • Logical ‘0’ – a 562.5µs pulse burst followed by a 562.5µs space, with a total transmit time of 1.125ms
  • Logical ‘1’ – a 562.5µs pulse burst followed by a 1.6875ms space, with a total transmit time of 2.25

For more detail: NEC Protocol IR (Infrared) Remote Control With a Microcontroller

The post NEC Protocol IR (Infrared) Remote Control With a Microcontroller appeared first on PIC Microcontroller.

Remote-Control Light Dimmer using pic microcontroller

$
0
0

The lamp in my bedroom is a very cheap lamp from Wal-Mart. It stands in one corner of my room, opposite of the door. This is where the problem is: If it is dark, I have to walk across the room, not trip on anything, find the small knob to twist to turn on the lamp, walk back towards whatever I need to do in the room. That is a whole lot of unnecessary walking.

Remote-Control Light DimmerAs can be imagined, this annoyed me. I decided to make a remote-control for the lamp. And since I was making a remote control, I decided that I might as well make it a dimmer – something I’ve wanted from this lamp for a while. I lacked any enclosures, so I used a tin can from what I can only assume were Chinese Altoids.

The IR protocol is very simple. At the physical layer I stole it from a previous project of mine. IR 940nm LED is used. The carrier frequency is 34KHz. A 1-bit is sent with 0.5 ms of modulated carrier and 1.5 ms of darkness. A 0-bit is sent with 0.5 ms of modulated carrier and 0.5 ms of darkness. The packet begins with a preamble byte of 0xFF. Then comes a header of 0x06. Then comes the device ID – a 32-bit identifier of the device. For this project, I used a device ID of {‘A’ ‘B’, ‘L’, ‘1’}. Then comes the button code.

Remote-Control Light Dimmer2 bytes are used, big-endian. This project uses just three button codes: 0 for “power on/off”, 1 for “brightness up,” and 2 for “brightness down.” Then comes a checksum. It is used to make sure that the packet is received successfully and error-free. Then comes the trailer byte of 0xFF. This protocol allows for over 4 billion device types and more than 65 thousand buttons for each.


For more detail: Remote-Control Light Dimmer

The post Remote-Control Light Dimmer using pic microcontroller appeared first on PIC Microcontroller.

DIY remote control based on PIC16F628

$
0
0

Control up to 8 devices by this easy constructable remote control. It can work as a radio or infrared remote control, depending on the components. Each device output can be configured to be momentary (turned on while you press the button) or latched. Latched outputs can be toggled on/off by one button per channel, or turned on and off by two buttons per channel.

DIY remote control based on PIC

Try it now, before building! Click on the transmitter buttons with the green labels on the left and see how the receiver outputs (K1-K8) change. Change the number of transmitter or receiver channels. Switch the receiver output type between latched and momentary.

Containing a PIC microcontroller, the circuit is very flexible. You can decide which receiver outputs are latched and which are momentary. The Manchester-coded transmitter output is well suited for the cheapest ASK radio modules or for infrared control. The units are configurable to a unique address, which must match to control the devices.

Related project: Learning remote control receiver
Take your existing remote control and control everything with it. This receiver can learn codes from an RC-5 format IR remote control, and associate the buttons to different channels and actions.

Related project: 2^16 remote control encoder and decoder
If you have TTL signals to control remote digital output lines, please check this project instead.

If you have trouble with programming PIC microcontrollers, you can consider builing other circuits based on Holtek HT-12D, HT-12E, Princeton PT2262, PT2272 and Motorola MC145026, MC145027, MC145028 encoders/decoders.

4/8-channel V4.2 radio transmitter

The difference between the 4-channel and the 8-channel version is only the software inside. The 8-channel transmitter has one button (S1-S8) per channel. The 4-channel transmitter uses S1-S4 buttons to turn on, S5-S8 buttons to turn off channel 1-4 (use with latched outputs on the receiver). The D1-D4 diodes and J1-J4 jumpers are optional, and are used to setup the transmitter address. Higher supply voltage results higher transmit power, but V+ range is 2-5.5VDC for the PIC MCU. When V+ is higher than 5VDC, use separate power for the mcu.

Configure & download
What if you can’t get a pic16f630?


For more detail: DIY remote control based on PIC16F628

The post DIY remote control based on PIC16F628 appeared first on PIC Microcontroller.

Viewing all 27 articles
Browse latest View live


<script src="https://jsc.adskeeper.com/r/s/rssing.com.1596347.js" async> </script>